Prop making to the Lalaloopsy doll chandeleir prop
[vc_row css=”.vc_custom_1713439534650{padding-top: 20px !important;}”][vc_column][vc_custom_heading text=”Parts that make up this beauty” font_container=”tag:h4|text_align:left” use_theme_fonts=”yes”][vc_empty_space height=”30px”][vc_column_text]
- A gifted chandelier
- Many Lalaloopsy dolls
- x2 preloved lamp shades
- A range of plastic flowers
- White and off-white textured fabrics from vintage dresses
- A gorgeous brooch bought from Etsy (used as a feature piece, not on permanently so it can be worn).
- Cheese cloth ripped up
- Off-white spray paint
- Bull dog clips
- Needle and thread (Off-white)
I also bought a ‘Table Lamp Hand Dimmer’ for the chandelier (from Liquidleds Australia) as the individual light bulbs when taking photos flared out too much. It actually slightly flickers when it gets to a certain brightness, which I like![/vc_column_text][vc_empty_space height=”40px”][vc_masonry_media_grid grid_id=”vc_gid:1714534755512-19f90225-5ab5-9″ include=”8114,8112,8113,8111,8108,8107″][vc_empty_space height=”40px”][vc_custom_heading text=”Visual diary to notes, making this piece” font_container=”tag:h4|text_align:left” use_theme_fonts=”yes”][vc_empty_space height=”30px”][vc_column_text css=”.vc_custom_1714534990055{padding-bottom: 20px !important;}”]Please note – This is not a tutorial! – All the pieces are random, this is just a guide and mostly everything I make is unique due to the nature of finding random items and assembling them to work as one.
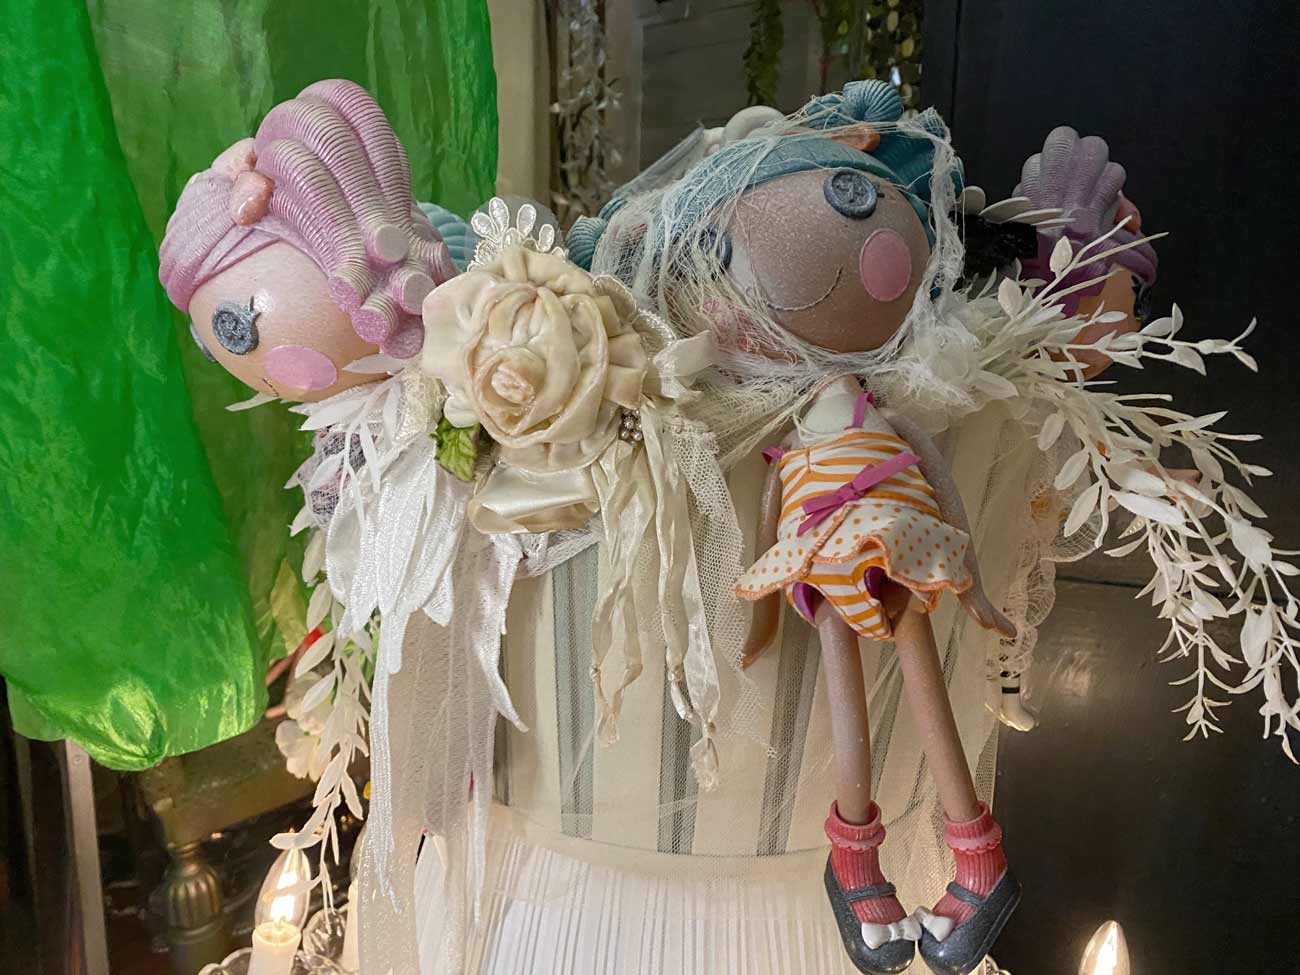
Firstly I’ve been eyeing off second hand lamp shades for ages. I finally found one that I thought would be a good fit for this chandelier, but then thought this finished piece needed more height, so I sourced another. I made sure the two lamp shades fitted well on top of the chandelier and also stacked on top of each other. I also wanted to add lots of off-white or green vines to the top of this piece, but I haven’t quite got to this part (yet)!
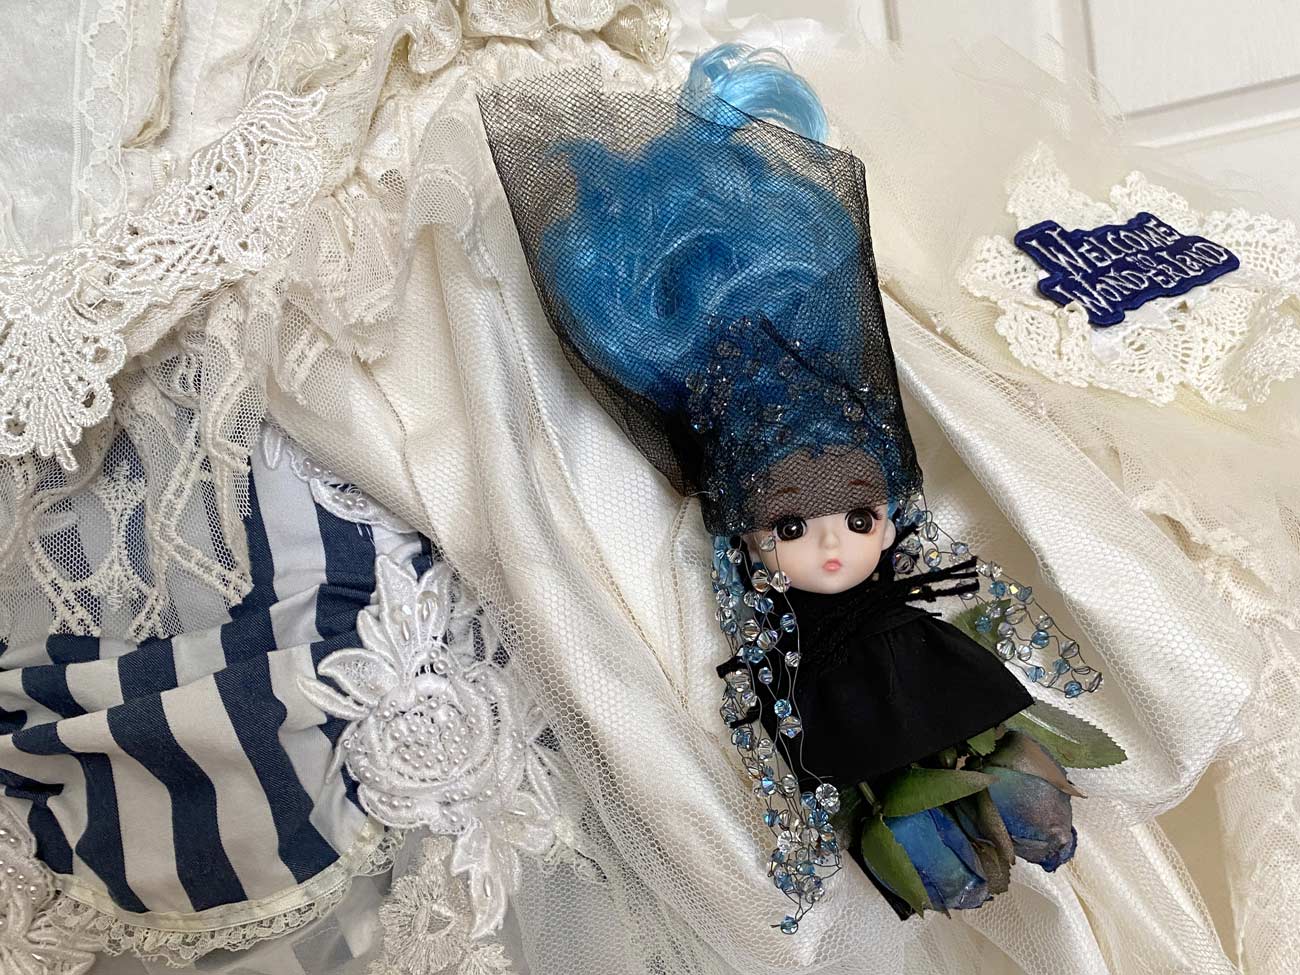
Dolls with button eyes, how can anyone not love these treasures, the Lalaloopsy dolls! Once I worked out which dollies would look best next to each other from the 6 dolls, I dropped the various fabrics and cheese cloth cut in to random sizes and then stretched, pulled out accordingly. Adding the bull dog clips where I wanted to position them.
I then used various threads and the cheese cloth to attach the dolls to the lamp shade. Loved in particular adding the cheese cloth all disheveled as this is when the gates to creativity open up for me.
For the gap areas between the dolls, I used a skull face glued into the centre of a faux flower and some white daisy flowers from a preloved picture frame I dismantled, now as singular pretties. I added ribbons and faux foliage to the stems with a glue gun (this part was done several years ago).
I also added a gorgeous brooch piece I got from an Etsy seller SusanJanesCreations, who sells beautiful one off pieces. It suits this prop so much, however I want to wear it whenever, therefore it’s not a permanent fixture.
Lastly the dimmer mentioned earlier was attached in order to create the right lighting for photos, in order to see the individual bulbs, not over-lit bursts of light in the photo frame. I bought this dimmer product mentioned above, as you don’t need an electrician to add it to the wall, instead it’s just plugged straight into the wall and the chandelier is slotted into the socket on top.[/vc_column_text][vc_empty_space height=”40px”][vc_masonry_media_grid grid_id=”vc_gid:1714534755519-d4e8fa79-8a25-2″ include=”8106,8105,8116″][vc_empty_space height=”40px”][/vc_column][/vc_row][vc_row][vc_column][vc_row_inner][vc_column_inner width=”1/4″][vc_gallery interval=”3″ images=”8119″ img_size=”450×600″ onclick=””][/vc_column_inner][vc_column_inner width=”1/2″][vc_column_text css=”.vc_custom_1714533226397{padding-top: 20px !important;padding-bottom: 20px !important;}”]A fun piece to sit in front of as a backdrop, or for a person to get behind or toy with it during a photo shoot with doll makeup to go! It’s an organic piece and I love that elements can be added and subtracted at whim.
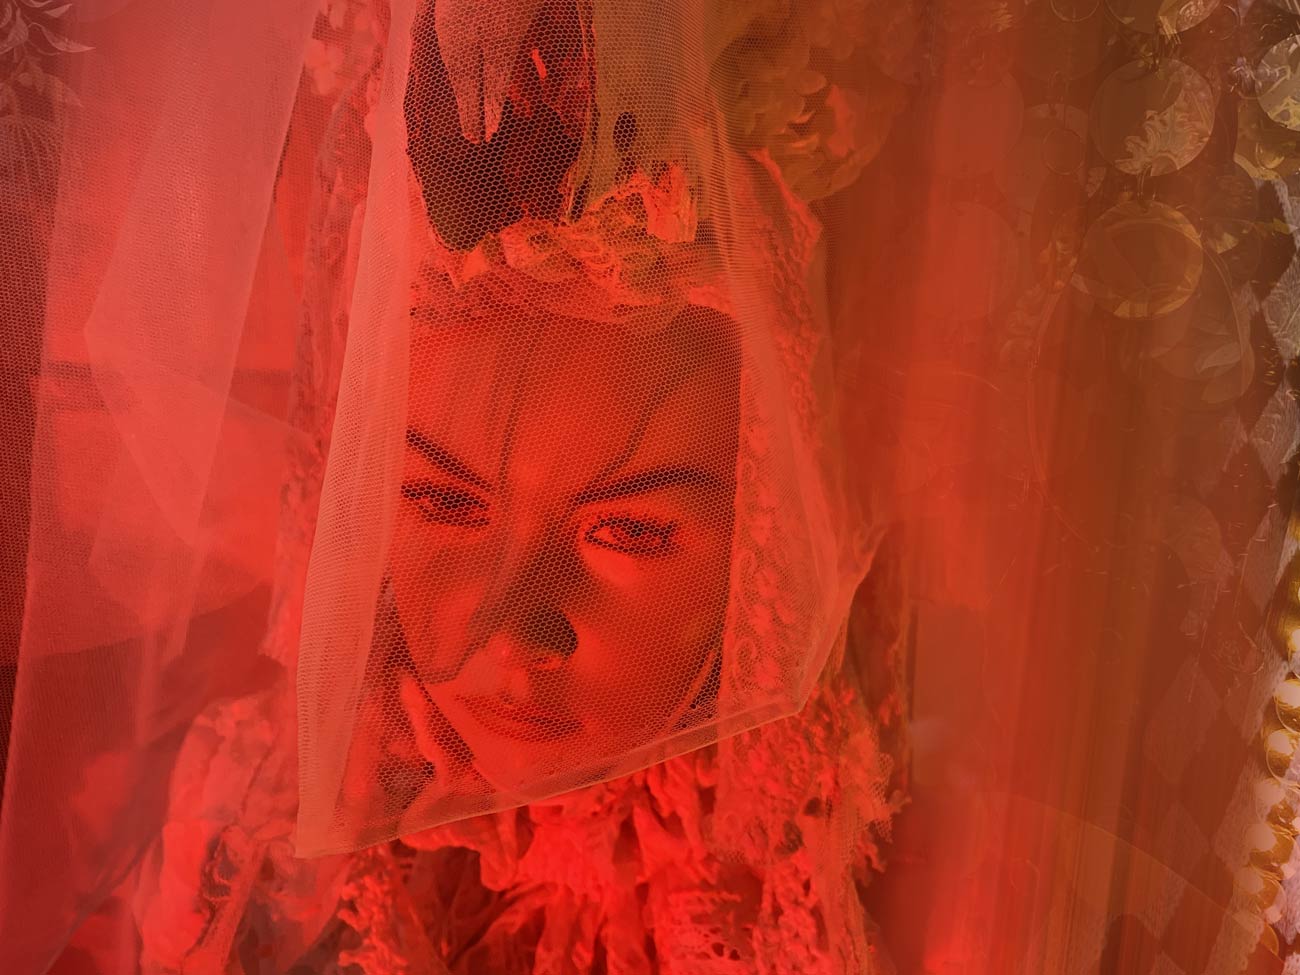
Photo left – See the blog piece how the Lala headpiece was made, to be posted shortly. I’d love as many people as up for it, to come to the studio here and do a photo shoot as real dolls. A favourite of mine, can you tell?
Photo right – When the Lolita Alice dress came in, I decided to dress up as a quirky Alice and have my makeup and hair (wig, in this instance) styled by Pam from Phoenix Hair & Makeup Artistry. Pam followed my brief with added creativity and flair.[/vc_column_text][/vc_column_inner][vc_column_inner width=”1/4″][vc_gallery interval=”3″ images=”8120″ img_size=”450×600″][/vc_column_inner][/vc_row_inner][/vc_column][/vc_row][vc_row][vc_column][vc_empty_space height=”40px”][/vc_column][/vc_row]